Showing posts with label pdf. Show all posts
Monday, November 05, 2018
Making A Mandy Boat Tee - Tessuti Fabrics
Pattern: Tessuti Mandy Boat Tee (2013) is available as a FREE download at this link.
Pattern Description: Oversized boxy top with shallow boat neckline with dropped shoulders and three-quarter-length fitted sleeves.
Pattern Sizing: One size fits all, finished length: 23.5", finished width: 58".
Did it look like the photo/drawing on the pattern envelope once you were done sewing with it? Yes!
Were the instructions easy to follow? Extremely easy. Although the instructions call for twin needle hems, I turned down a 5/8" hem on the neckline, folded the raw edge inside, and did a single line of stitching. Realizing then that perhaps I should have narrowed the width of the neckline, so I tapered the shoulder seam from the 3 /8" at the sleeve out to 3/4" at the neck.
What did you particularly like or dislike about the pattern? I love the thoroughly oversized shape of this tee, but like the Grainline Hemlock the lower arms were still too narrow for comfort.
Fabric Used: Bole brown heather grey 1/2" stripe cotton jersey (50% cotton, 25% rayon, 25% polyester) from Girl Charlee Fabrics.
Pattern alterations or any design changes you made: I narrowed the neckline, shortened the length by quite a lot and lowered the armscye by 1/2". After construction, but before the top and sleeve hems, I found the sleeves were bordering on too tight, so I decreased the seam allowance from 3/8" to 1/4".
Would you sew it again? Would you recommend it to others? Yes, most definitely. I suggest that you measure your biceps and forearms and check to see if you need to make adjustments to the sleeve pattern piece before construction.
Conclusion: I love my new top. It fulfills this inspirational Pin I collected a few years ago and it just happens to match this one from Sew Dainty who made hers with the exact same fabric. In addition, this top matches perfectly with my brown Ponte Butterick 6464 skirt. Instant ensemble!
Labels:
handmadewardrobe,
imadethis2018,
indiepattern,
pdf,
Tessuti,
top
Thursday, May 03, 2018
Two Tester Tropo Camisoles - Tuesday Stitches*
Pattern Description: Form-fitting camisole in three cup sizes, various neckline/strap options, side gathers, and an optional shelf bra. Tester 1) View C, sweetheart neckline on both sides. Tester 2) View B, curved neckline on front, straight on back.
Pattern Sizing: Sizes 0-24, high bust 32"-52", A-B, C-D, E-F cups. For both, I cut size 10 in a C-D cup, sized out to a 14 at the hips for my niece. Yes, I'm doing some unselfish sewing!
Did it look like the photo/drawing on the pattern envelope once you were done sewing with it? Yes, exactly.Were the instructions easy to follow? Yes, it has a very simple construction.
What did you particularly like or dislike about the pattern? I loved that I could make this for my niece who is currently pregnant with her first child. She's a personal trainer, so supportive tank tops are already a wardrobe stable for her.
Fabric Used: Two yards 58" performance jersey (88% Polyester/12% Spandex) in space dye black from Jo-Ann Fabrics for $13.59 (16.99 at 40% off), 5/8" black fold-over elastic (FOE) from Elastic By The Yard, and Dritz 3/4" braided elastic.
Pattern alterations or any design changes you made: I was at a disadvantage because I wasn't able to take her measurements. She supplied her own and she has never sewn, therefore, I had no confidence in their accuracy. I found myself second guessing which size to cut and that included the elastic lengths too. Eventually, I cut a size 10 in a C-D cup and increased the hips out to size 14.
I constructed the darts in both the tank and shelf bra then moved onto the side gathers, though I was surprised that elastic was not being used for these.
![]() |
| On the 1st one I used the wrong elastic. |
For the bralette, I chose to cut the elastic to the size 10 length of 35". The bralette is constructed so that the seam allowances sit inside the two layers to eliminate chafing but I got confused and the softest side of the fabric ended up inside there and not against the skin.
![]() |
| V. 1 worn. |
For the neckline, I again went with the pattern's guideline and cut my elastic to lengths of 13.75" and 19.5" for a size 10. I sewed my FOE using the two-step method in the pattern and made a big mistake. For the first pass, I placed the elastic against the right side of the fabric. Even though I only did a basting stitch that I could remove later on, it was the second stitching pass that was neat and more attractive but that ended up on the inside! I had run out of black thread, was on a roll, and didn't want to stop so the straps have light gray stitching. I'm so happy this was a test garment!
Even so, I still stitched in my first custom label on the back.
I couldn't get over how long the tank seemed so instead of the suggested 3/4" hem, I made it 1-1/4" and finished it with two rows of zigzag stitches.
![]() |
| Front with extra length. |
![]() |
| This shows that the back is shorter. |
![]() |
| View B |
Luckily, that first one fit. My niece was happy with it but wanted some changes and since I had purchased twice the amount of fabric I made her another one. I made even more changes when I cut out this version by choosing the view B curved neckline for the front but with the straight back, and I made the bralette 1/2" longer. Additionally, I cut the side seams a 1/4" wider for a total inch increase in width, just in case.
My niece requested that I make the front gathered panel longer for more bump coverage so I cut the front two inches longer and for some reason*** I cut the back 1/2" shorter.
For the neckline, I cut the suggested lengths of 13.75" and 19.5" for the size 10. I sewed my FOE using the two-step method in the pattern and remedied my mistake from the first one. I basted the elastic against the wrong side of the fabric and in the second pass carefully and neatly stitched it on the right side.
The straps on the first one were a bit tight so she wondered if I could substitute adjustable bra straps instead. Luckily, I had already taken apart a few of my old camisoles and bras for parts months ago so I didn't have to buy any hardware. I consulted the Internet and after seeing this tutorial, I realized I could make each strap from just one longer piece of elastic, whereas in other tutorials they use two separate pieces. I calculated a 27.5" length for each one and set aside 2" at each end to later form the attachment loop on the front bodice (which really should have been the back!). The next 13" of elastic was attached to the entire underarm curve (14.5" in total) splitting it equally in 6.5" on each side of the seam. I used a zigzag stitch for that but used a straight stitch for the rest of the straps. I unfortunately couldn't get any good pictures but trust me, it looked good.
Would you sew it again? Would you recommend it to others? This was a good pattern. Since I had bought more fabric than needed, these two yards made three tanks in all, two Tropos for my niece and another one for myself from a tracing of a tank in my wardrobe. However, for mine, I only had enough to create a shelf bra panel for the front.
![]() |
| Early days, worn at 12 weeks. |
![]() |
| Update: 30 weeks! |
![]() |
| The belly has moved the gathers. |
In my tester feedback, I suggested that instructions for adjustable bra straps and/or a nursing tank conversion should be included in the pattern and the final maternity version, which will be released by Maternity Sewing, will include instructions for a nursing tank. While I was asked to test a maternity tank called Tropo, it seems they have removed the side gathers from the design and released it first in a non-maternity version with Tuesday Stitches because on the website I don't notice them on the modeled versions and they are no longer mentioned in the pattern description.
* F.Y.I. The company name is new, when I was first contacted it was still known as SeamstressErin Designs.
** Final maternity version to be released once the MaternitySewing.com site has launched.
*** I really don't remember why.
Labels:
family,
gifts,
imadethis2018,
indiepattern,
pdf,
Seamstresserin,
stretch,
testpattern,
top
Wednesday, February 08, 2017
Surprise! Actually Buying Fabric With A Purpose!
When swatching fabrics from Mood Fabrics two years ago, I decided to see what all the fuss was about 4-ply silk. I ordered swatches of it, along with some of silk charmeuse and silk crepe de chine in some rich jewel colors. There was a gorgeous emerald green crepe de chine that I really liked but I had no real reason to order any silk.
In 2010, I had written about "THAT green dress" worn by Keira Knightley in 2007's Atonement. The dress made of silk satin was designed by Jacqueline Durran and I was fascinated by the story of the construction and the tales of the garments' extreme fragility. When I held that emerald green silk swatch, that dress was the first image that came to mind along with all its 1920s details and influences.
Then in 2015, my niece announced that she was getting married the summer of 2017 and I realized "Well, I AM going to need a party dress!" The only semi or formal gowns I had in reserve were one former bridesmaid dress from 15 years ago (actually wearable and I had hoped for an opportunity to wear it again!) and one black (!) satin affair. The old bridesmaid dress could be worn for the rehearsal dinner because that silk crepe swatch had now become a real dress possibility.
In my pattern stash, I had the two free indie PDF patterns, the Eva dress from Your Style Rocks and the Little Bias Dress by Vera Venus. I assumed at the time that I would use one of them for the dress. However, over the last few months, I've tracked down real life examples of these dresses made up and I've lost my love for them. The Eva dress was dropped first, it is a great design that I hope to still make up but I now want to have my 1920-30s bias silk dress fantasy and that is not the Eva.
I had been pretty convinced the Vera Venus Little Bias Dress (LBD) was "the one" but time has made me question that thought. When I first downloaded the pattern I matched the measurements, but not now, which means alteration would be necessary.
Well, time has sped along and that wedding is now only five months away. I need to choose a pattern that will result in a flowing, figure-enhancing, 1920-30s styled dress and is fairly simple to make for my first time sewing with silk.
On Instagram, @sewandstyle_ posted a Diane von Furstenburg "Dita" dress and a sketch of it's construction. I was struck at how familiar that dressed looked and remembered a New Look pattern that was constructed very similarly. See? The skirt panels are attached the exact same way!
So right now, this is the dress to beat! Yes, the 1930's influence isn't really there but I can't stop thinking of this dress now. The skirt for New Look 6244 seems fuller than the Dita (about 110" in width) so a muslin must be created time and the asymmetrical hemline will need to be drafted, which I think will help add the vintage element. In addition, the hemming of that hemline will be another hurdle to jump.
But look at these gorgeous examples of the Dita dress. Oh, how I would love to end up with something like this!
So no doubt about it, I will need to perfect a muslin in order to replicate the Dita using this pattern, because of the difference in the skirts' fullness and hemline.
Part of me wants to try the dress first in a polyester crepe de chine. However, the final dress must be in silk, a fabric I have never sewn; therefore, I need to know how the fabric behaves when cutting it out, sewing it on my tempestuous machine, and when adding closures or hemming by hand.
I need to practice sewing silk on a simpler project like a bias camisole or drapey top for practice and to also make a polyester trial of the dress. So, yes I have a lot of sewing to do before the tenth of June!
In 2010, I had written about "THAT green dress" worn by Keira Knightley in 2007's Atonement. The dress made of silk satin was designed by Jacqueline Durran and I was fascinated by the story of the construction and the tales of the garments' extreme fragility. When I held that emerald green silk swatch, that dress was the first image that came to mind along with all its 1920s details and influences.
Then in 2015, my niece announced that she was getting married the summer of 2017 and I realized "Well, I AM going to need a party dress!" The only semi or formal gowns I had in reserve were one former bridesmaid dress from 15 years ago (actually wearable and I had hoped for an opportunity to wear it again!) and one black (!) satin affair. The old bridesmaid dress could be worn for the rehearsal dinner because that silk crepe swatch had now become a real dress possibility.
In my pattern stash, I had the two free indie PDF patterns, the Eva dress from Your Style Rocks and the Little Bias Dress by Vera Venus. I assumed at the time that I would use one of them for the dress. However, over the last few months, I've tracked down real life examples of these dresses made up and I've lost my love for them. The Eva dress was dropped first, it is a great design that I hope to still make up but I now want to have my 1920-30s bias silk dress fantasy and that is not the Eva.
I had been pretty convinced the Vera Venus Little Bias Dress (LBD) was "the one" but time has made me question that thought. When I first downloaded the pattern I matched the measurements, but not now, which means alteration would be necessary.
Well, time has sped along and that wedding is now only five months away. I need to choose a pattern that will result in a flowing, figure-enhancing, 1920-30s styled dress and is fairly simple to make for my first time sewing with silk.
On Instagram, @sewandstyle_ posted a Diane von Furstenburg "Dita" dress and a sketch of it's construction. I was struck at how familiar that dressed looked and remembered a New Look pattern that was constructed very similarly. See? The skirt panels are attached the exact same way!
So right now, this is the dress to beat! Yes, the 1930's influence isn't really there but I can't stop thinking of this dress now. The skirt for New Look 6244 seems fuller than the Dita (about 110" in width) so a muslin must be created time and the asymmetrical hemline will need to be drafted, which I think will help add the vintage element. In addition, the hemming of that hemline will be another hurdle to jump.
But look at these gorgeous examples of the Dita dress. Oh, how I would love to end up with something like this!
So no doubt about it, I will need to perfect a muslin in order to replicate the Dita using this pattern, because of the difference in the skirts' fullness and hemline.
![]() |
| Maybe even this hemline is doable? |
Part of me wants to try the dress first in a polyester crepe de chine. However, the final dress must be in silk, a fabric I have never sewn; therefore, I need to know how the fabric behaves when cutting it out, sewing it on my tempestuous machine, and when adding closures or hemming by hand.
I need to practice sewing silk on a simpler project like a bias camisole or drapey top for practice and to also make a polyester trial of the dress. So, yes I have a lot of sewing to do before the tenth of June!
Labels:
dress,
familywedding2017,
indiepattern,
moodfabrics,
NewLook,
pdf,
retro,
sewingchallenge,
silkproject,
veravenus,
weddingguestdress
Wednesday, October 26, 2016
Stretch Pant Trial Run - Style Arc Barb's Stretch Pant
Pattern: Style Arc Barb's Stretch Pant (2014)
Pattern Sizing: Size 12-14-16. I cut the size 14 (W: 33.5 in. H: 42.5 in.) and made some changes to the pattern.
Did it look like the photo/drawing on the pattern envelope once you were done sewing it? Yes, exactly. However, mine were a touch too small!
Were the instructions easy to follow? Extremely! This is a very simple pant which makes it ideal for trying to nail down what kind of fitting adjustments you may need to make to pants in general.
What did you particularly like or dislike about the pattern? Most importantly, the company offered it as a FREE PDF download here. This allowed me to try out the company's pants draft before making a monetary commitment. Two, this seemed like a very simple pattern, no zipper insertion, or lined waistband.
Fabric Used: Cream stretch suiting (95% polyester 5% Lycra) from Jo-Ann Fabrics on clearance, Dritz 2-inch wide knit elastic.
Pattern Alterations or any design changes you made: Current sewing situations have taught me that it wouldn't hurt to do a full tummy adjustment and a protruding seat adjustment when making pants so I first made a tracing of the pattern for my muslin.
I added an inch wedge to both the front and back just to be safe. As it turns out, perhaps a full inch at front was not necessary.
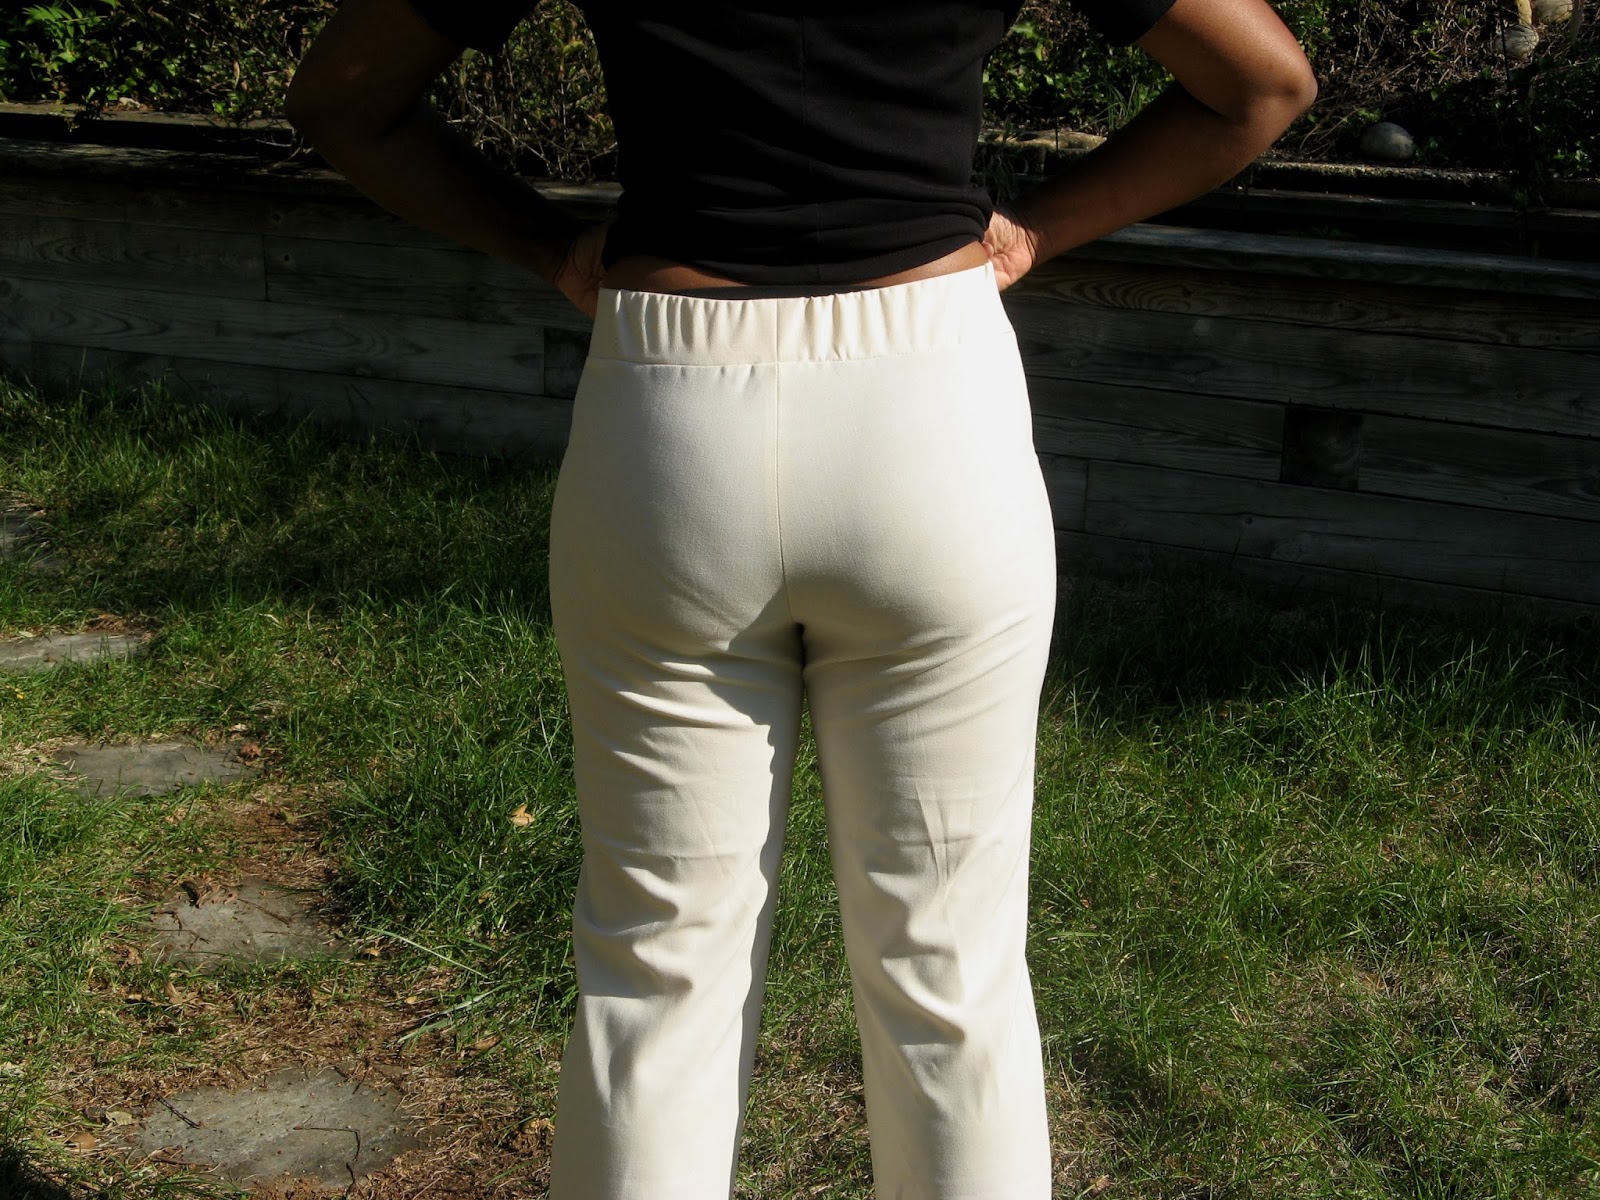
However, the adjustment at the back was perfect and I like how the ole bum looks. I believe the wrinkle problem there in back is because my inner thighs need more width so I will add a full thigh adjustment to the front for the next muslin.
When I first saw this waistband sewn up and placed next to the pants in the image above I doubted that it would fit over my hips. However, being cut the way it was it expanded the right amount to fit the pants, even before any elastic was involved.
The elastic was placed inside the completed waistband and basted closed before it was attached to the pants. This allowed the elastic to fit snug in the casing and eliminate any excess room that would allow it to twist around inside the casing.
Here is the finished muslin from the side. Note the protruding abdomen, (and then feel free to forever abolish the image from your brain!) the tautness of the fabric below it, and that crooked side seam. This muslin is too small. All of these pictures were taken months after the pants were first completed. At that point, they were really too small. I have since lost some weight and dietary changes have somewhat adjusted my abdominal bloat, so there has been a great improvement to that original fit. Unfortunately, the picture is so washed out but you may be able to see where the side seam indicates where more width in the pattern is needed. Try hard you can also see the beginnings of those diagonal wrinkles towards the back indicating the need for the full thigh adjustment.
The view from the front is where you can see the high waist and how they fit at the front thigh with a few radiating markers of fitting issues. Also note that once on, despite the 10" difference between my hips and waist, the amount of visible gathers from the waistband are minimal and don't add too much bulk. So the waistband works, but the rest of the pants do not.
Last little note, since these were never meant to be finished, I cut almost 4 inches from the length in order to try them on. I am 5' 4" inches tall, so definitely compare your desired pant length against the pattern pieces before laying and cutting out your fabric. I would hate for you to lose that much fabric needlessly.
Would you sew it again? Would you recommend it to others? Since this is a muslin, the real question is will this pattern work well enough for a final version? I believe so, with a minimum of changes. The waistband is a keeper and the use of 2" elastic creates a comforting and supportive waistband; especially if you have some girth you wish to control in that area.
Unfortunately, my muslin did not fit, but then that's the purpose of a muslin. I don't know how much can be blamed on the fabric choice since the Lycra content of this particular fabric was a mystery and I did not know exactly how much* stretch the pattern required. According to the company's posted measurements (waist: 33.5, hip: 42.5) I did choose the right size and in fact, those numbers are 1" larger in the waist and .5" in the hip. However, my full abdomen and inner thighs may have affected the ease distribution.
Conclusion: I will make these pants again and not only to adjust and correct the pattern before attempting the other two Style Arc pants patterns I own. This was a more than decent muslin compared to other pants patterns I have tried. If I hadn't made them out of a see-through white fabric I could even see finishing them off and wearing them out on my "no bread and dairy" days.
*Instead of suggesting a Lycra/spandex content percentage, Style Arc instead directs you to purchase their own stretch gabardine that possesses a 30% vertical stretch (?).
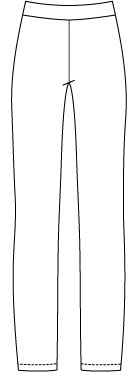
Pattern Description: Pull-on pant with elasticized waistband made in a stretch woven.
Pattern Sizing: Size 12-14-16. I cut the size 14 (W: 33.5 in. H: 42.5 in.) and made some changes to the pattern.
Did it look like the photo/drawing on the pattern envelope once you were done sewing it? Yes, exactly. However, mine were a touch too small!
Were the instructions easy to follow? Extremely! This is a very simple pant which makes it ideal for trying to nail down what kind of fitting adjustments you may need to make to pants in general.
What did you particularly like or dislike about the pattern? Most importantly, the company offered it as a FREE PDF download here. This allowed me to try out the company's pants draft before making a monetary commitment. Two, this seemed like a very simple pattern, no zipper insertion, or lined waistband.Fabric Used: Cream stretch suiting (95% polyester 5% Lycra) from Jo-Ann Fabrics on clearance, Dritz 2-inch wide knit elastic.
![]() |
| Cut and spread to add room for the stomach |
![]() |
| Page 57 of Sewing Pants That Fit. |
I added an inch wedge to both the front and back just to be safe. As it turns out, perhaps a full inch at front was not necessary.
However, the adjustment at the back was perfect and I like how the ole bum looks. I believe the wrinkle problem there in back is because my inner thighs need more width so I will add a full thigh adjustment to the front for the next muslin.
A plus of the pattern draft is how they handled the waistband. Note the angle from the top of the waistband down. This shows an awareness that this is a wider than usual waistband and that the body is going to widen out from that top point but that you still want a slim as possible waist.
![]() |
| Note the angle of the waistband at the sides and how it meets the pants. |
The elastic was placed inside the completed waistband and basted closed before it was attached to the pants. This allowed the elastic to fit snug in the casing and eliminate any excess room that would allow it to twist around inside the casing.
| Not loving this view! |
The view from the front is where you can see the high waist and how they fit at the front thigh with a few radiating markers of fitting issues. Also note that once on, despite the 10" difference between my hips and waist, the amount of visible gathers from the waistband are minimal and don't add too much bulk. So the waistband works, but the rest of the pants do not.
Last little note, since these were never meant to be finished, I cut almost 4 inches from the length in order to try them on. I am 5' 4" inches tall, so definitely compare your desired pant length against the pattern pieces before laying and cutting out your fabric. I would hate for you to lose that much fabric needlessly.
Would you sew it again? Would you recommend it to others? Since this is a muslin, the real question is will this pattern work well enough for a final version? I believe so, with a minimum of changes. The waistband is a keeper and the use of 2" elastic creates a comforting and supportive waistband; especially if you have some girth you wish to control in that area.
Unfortunately, my muslin did not fit, but then that's the purpose of a muslin. I don't know how much can be blamed on the fabric choice since the Lycra content of this particular fabric was a mystery and I did not know exactly how much* stretch the pattern required. According to the company's posted measurements (waist: 33.5, hip: 42.5) I did choose the right size and in fact, those numbers are 1" larger in the waist and .5" in the hip. However, my full abdomen and inner thighs may have affected the ease distribution.
Conclusion: I will make these pants again and not only to adjust and correct the pattern before attempting the other two Style Arc pants patterns I own. This was a more than decent muslin compared to other pants patterns I have tried. If I hadn't made them out of a see-through white fabric I could even see finishing them off and wearing them out on my "no bread and dairy" days.
*Instead of suggesting a Lycra/spandex content percentage, Style Arc instead directs you to purchase their own stretch gabardine that possesses a 30% vertical stretch (?).
Labels:
alterations,
indiepattern,
muslin,
pants,
pdf,
stretch,
Stylearc
Tuesday, October 04, 2016
Just Keep Sewing, Just Keep Sewing...Pants!
To complete my wardrobe I need to make some pants, but my fluctuating size and food gut issues abound. Therefore, I've been looking for patterns that will allow for these spontaneous changes in shape. I kept seeing the elastic waist Style Arc Barb pant mentioned. While doing my research and checking how the finished garments looked on other sewists, I found out that by signing up for the Style Arc newsletter here I could receive a FREE pdf copy of the Barb pattern. This pattern could be made in a ponte or a stretch woven like the stretch bengaline from Jo-Anns. I could try out the company's pattern drafting and fit first before actually paying for one of their regularly priced patterns. I selected the size 14 (W: 33.5 in. H: 42.5 in.) and they graciously sent over the pattern in that size along with sizes 12 and 16. I had been debating buying their Style Arc Ebony pant (which I went ahead and already bought with the Lola on sale!), whose design detail around the abdomen area would work to flatter my new silhouette.
The suitable fabrics that I have in my stash for pants are already assigned to specific patterns: a gray ponte meant for Vogue 1411, a Sandra Betzina design with interesting seam lines; chocolate brown stretch poplin to make a muslin for the Built By Wendy pants in Sew U, and an army green stretch woven meant for the final Sew U pants. The only currently free fabric, a gorgeous gray marl woven, was originally meant for a pair of Vogue 1922, then a pair of New Look 6216; unfortunately, now both patterns would need extensive alteration to match the image in my head. However, it could be perfect for the Ebony, but I would like to start with a more practical pant/fabric combo first.
So, my choices for venturing into introductory pants production are Vogue 2002, an OOP Calvin Klein designer pattern from the 90s with a side zipper and a flared leg; Simplicity 1283, a flare leg Mimi G. design that Kyle of Vacuuming the Lawn recommends (minus some of the flare for mine), and the free Barb pant, a simple elastic-waist slim cut pant:
The true goal is to get the front and back rise correct, along with the c-curve so that I can transfer those measurements and shapes to all my pants. So first, I need a winning test sample that doesn't frustrate me or make me dread making more pants, so I'm going to start with the Barb stretch pant.
Have you made any of these and do you have any comments or advice that might help?
Style Arc Barb, Ebony, and Lola
The suitable fabrics that I have in my stash for pants are already assigned to specific patterns: a gray ponte meant for Vogue 1411, a Sandra Betzina design with interesting seam lines; chocolate brown stretch poplin to make a muslin for the Built By Wendy pants in Sew U, and an army green stretch woven meant for the final Sew U pants. The only currently free fabric, a gorgeous gray marl woven, was originally meant for a pair of Vogue 1922, then a pair of New Look 6216; unfortunately, now both patterns would need extensive alteration to match the image in my head. However, it could be perfect for the Ebony, but I would like to start with a more practical pant/fabric combo first.
So, my choices for venturing into introductory pants production are Vogue 2002, an OOP Calvin Klein designer pattern from the 90s with a side zipper and a flared leg; Simplicity 1283, a flare leg Mimi G. design that Kyle of Vacuuming the Lawn recommends (minus some of the flare for mine), and the free Barb pant, a simple elastic-waist slim cut pant:
Vogue 2002, Simplicity 1283, and Style Arc Barb
The true goal is to get the front and back rise correct, along with the c-curve so that I can transfer those measurements and shapes to all my pants. So first, I need a winning test sample that doesn't frustrate me or make me dread making more pants, so I'm going to start with the Barb stretch pant.
Have you made any of these and do you have any comments or advice that might help?
Labels:
download,
indiepattern,
pants,
patterns,
pdf,
sewing,
Simplicity,
stretch,
Stylearc,
Vogue
Subscribe to:
Posts (Atom)