Showing posts with label muslin. Show all posts

Tuesday, December 07, 2021

The Sea and the Soil - Style Arc Bob Woven Pants


Pattern: Style Arc Bob Woven Pants (2019)

Pattern Description: A uniquely balloon-shaped pant with an elastic waistband and inseam pockets.

Pattern Sizing: Sizes 4-30 (32"-61" hips) There is 7" of wearing/design ease between body measurement and finished garment measurement. Ideally, I would choose a size 18, but I printed this pattern months ago, so it was a size 16.


Did it look like the photo/drawing on the pattern envelope once you were done sewing with it? 
 Yes!


Were the instructions easy to follow? Yes, I thought so. Style Arc is known for sparse instructions; they do not hold your hand. However, in this pattern, they also split the construction steps into two places: the written instructions and the multi-color illustrated ones on a separate sheet. Only by reading them both do you get the complete process. Other than that, the instructions are adequate if you're an intermediate sewist but may be frustrating if you are a beginner. 

What did you particularly like or dislike about the pattern? I love the shape of the legs; they give the pants a modern vibe.

Fabric Used: Pair A) An old cotton/polyester sheet, Dritz 1-1/2" soft waistband elastic, Gutermann 100% polyester thread in no particular color; Pair B) 2 yards stretch cotton poplin in Chocolate from Fabric Mart, c. 2014 ($1.99 a yard!), Gutermann #100 polyester thread in Charcoal, #125, and Dritz 1-1/2" soft waistband elastic.


Pattern alterations or any design changes you made: For the muslin (A), as I was dealing with a smaller size than I would have liked, I changed the seam allowance to 1/4" and crossed my fingers. In the end, I might have been okay with 3/8", but it saved me some stress. In my second pair (B), I chose to throw caution to the wind and sewed a straight size 16 with the recommended seam allowance.

Attaching the waistband elastic

I liked the instructions for the waistband, which allow for equal distribution of the elastic and eliminates the possibility of twisting. However, I regret following those instructions on the muslin (A) because it denied me the option of adjusting the waist, which came out 1/2-1" too loose. (Actually, I think I used the size 18 length for the elastic, oops!) I like the technique; however, I suggest that you try on and adjust the elastic before you attach it to the waistband and the pants.

I read in other reviews that people were changing the pocket draft because the pockets were floppy. I understand that, but I feel that the pattern addresses that issue if you follow all of their instructions. The only sewist review I've read that understood the instructions the same as I did was Sewslowsarah. Hi, Sarah!

The illustrated portion of the instructions

Anchoring the pocket direction

In my second pair (B), I used the shorten/lengthen line to remove 1/2" in length. My blue pair were long enough to make the ballooning sides collapse on themselves; you can clearly see the shape in a slightly shorter length.

Hand sewing the inside waistband

Another change was how I handled the waistband for B. I decided to follow the first few steps of sewing the ends together and folding and pressing them in half. However, before attaching the elastic, I sewed one edge of the waistband to the pants. I then laid the elastic loop inside the fold and stitched it on with a wide zigzag stitch. From that point, I needed to either slip stitch the other edge to the pants or stitch-in-the-ditch. I chose to hand stitch, of course.

Would you sew it again? Would you recommend it to others? Yes, In fact, it was only a week before I cut out the second pair; I have never done that before! I also want to try them in a thicker fabric like corduroy and a fabric with drape like a rayon.


When I wore this ensemble to work a coworker thought I looked like Han Solo. What do you think?


Conclusion: These were better than I expected. I will be making more!

Friday, September 11, 2020

Sewing Update!

I can't believe it's been months since I wrote anything here. I've been thinking sewing if not doing it during the quarantine.

I have been lucky in the fact that my job had us start working from home the second week of March. My sewing room-slash-guest room added another name and use as a work-from-home office.

I first attempted a reorganization of my supplies, which made some improvement but needs more. I created separate binders that hold all the printed-out copies (the majority) of my PDF patterns; all my fitting and alteration tutorials and research; and another for general home repair and craft projects.

Unfortunately, I still have enough fabric that I have more than the plastic bins can hold, and some fabrics are in garbage bags. I'm not too fond of the message that is sending.

So, the main goal this summer was working through my immediate summer/fall projects. Instead of having yardage in various drawers, bins, and bags, I wanted it instead worn on my body. 

However, summer got away from me. Unfortunately, I hurt my back more than a month ago. I believe the chair I was using to work-from-home was the culprit. I've been seeing a chiropractor for that last three weeks and am slowing starting to sew again. You see, since the injury, I couldn't sit upright for weeks, so there was no sitting down in front of my machine. I've just started to sew again.


First on the list are some simple tops from leftover pieces of fabric in the stash. One top is a modified square with armholes. Another is my makeunder of the Assembly Line Cuff Top, which I can't seem to forget. I saw a picture of the actual pattern piece on Instagram, and I am attempting my version. 

I did buy more fabric, but it was all for quick makes, and unfortunately, both my sewjo and my back died, and most are still waiting. 


I have some cotton blends I bought back in 2019 from Joann's, especially for spring and summer tops, which I will STILL make after the muslins. That's what cardigans are for, right? Then I have some of my tried n' true fabric for shorts and a lovely dusky purple linen that I bought before the Jo-Ann Fabrics boycott. 


The linen is for a Simplicity 9139 that would replicate this inspiration photo.


After that, I caught a sale from Fabricmart for horizontally striped jerseys, my fabric weakness. Hopefully, one of them will be my first The Friday Company Adrienne blouse, another indie pattern that I've fallen in love with this year. The other two will be simple t-shirts, and luckily these all can be worn for a couple more months.

So, there should be more sewing content soon. But, don't hold me to that.

Wednesday, October 26, 2016

Stretch Pant Trial Run - Style Arc Barb's Stretch Pant

Pattern: Style Arc Barb's Stretch Pant (2014)

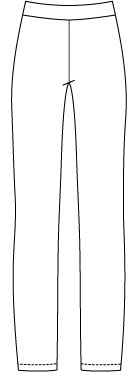
Pattern Description: Pull-on pant with elasticized waistband made in a stretch woven.

Pattern Sizing: Size 12-14-16. I cut the size 14 (W: 33.5 in. H: 42.5 in.) and made some changes to the pattern.

Did it look like the photo/drawing on the pattern envelope once you were done sewing it? Yes, exactly. However, mine were a touch too small!

Were the instructions easy to follow? Extremely! This is a very simple pant which makes it ideal for trying to nail down what kind of fitting adjustments you may need to make to pants in general.


What did you particularly like or dislike about the pattern? Most importantly, the company offered it as a FREE PDF download here. This allowed me to try out the company's pants draft before making a monetary commitment. Two, this seemed like a very simple pattern, no zipper insertion, or lined waistband.


Fabric Used: Cream stretch suiting (95% polyester 5% Lycra) from Jo-Ann Fabrics on clearance, Dritz 2-inch wide knit elastic.

Cut and spread to add room for the stomach
Pattern Alterations or any design changes you made: Current sewing situations have taught me that it wouldn't hurt to do a full tummy adjustment and a protruding seat adjustment when making pants so I first made a tracing of the pattern for my muslin.

Page 57 of Sewing Pants That Fit.

I added an inch wedge to both the front and back just to be safe. As it turns out, perhaps a full inch at front was not necessary.


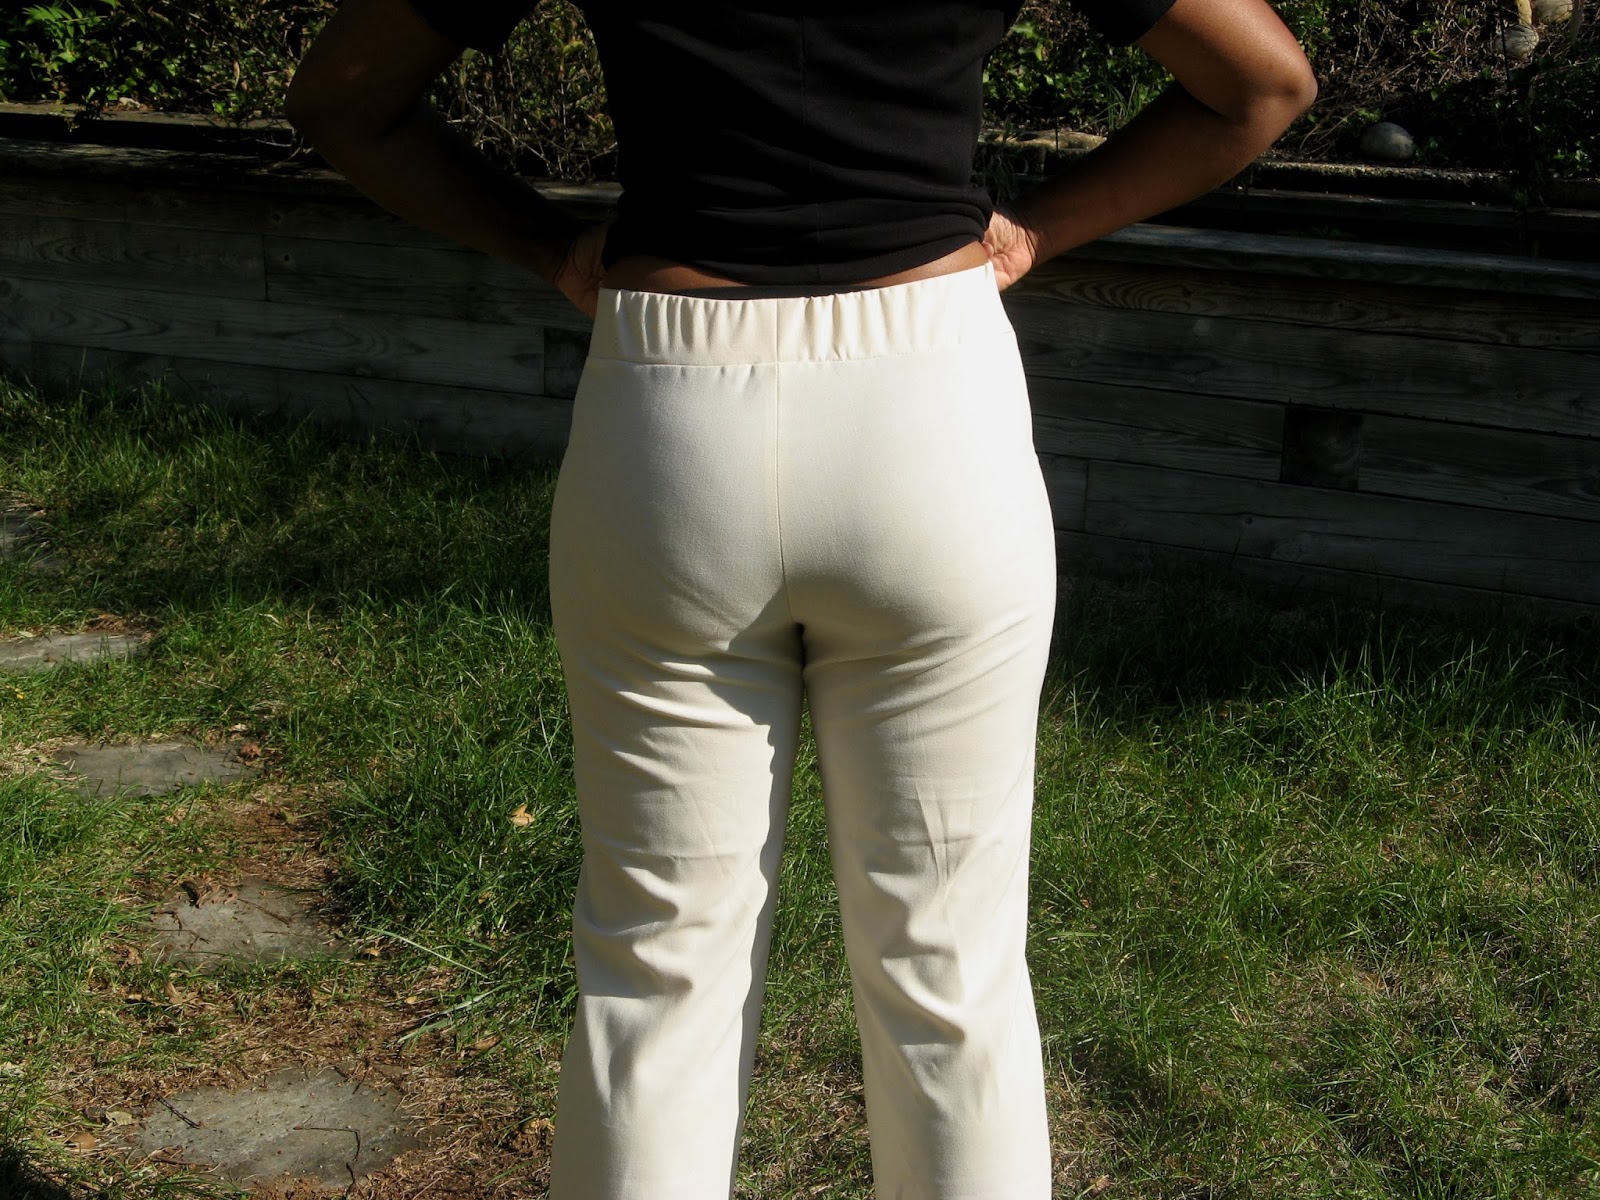
However, the adjustment at the back was perfect and I like how the ole bum looks. I believe the wrinkle problem there in back is because my inner thighs need more width so I will add a full thigh adjustment to the front for the next muslin.


A plus of the pattern draft is how they handled the waistband. Note the angle from the top of the waistband down. This shows an awareness that this is a wider than usual waistband and that the body is going to widen out from that top point but that you still want a slim as possible waist.

Note the angle of the waistband at the sides and how it meets the pants.

When I first saw this waistband sewn up and placed next to the pants in the image above I doubted that it would fit over my hips. However, being cut the way it was it expanded the right amount to fit the pants, even before any elastic was involved.


The elastic was placed inside the completed waistband and basted closed before it was attached to the pants. This allowed the elastic to fit snug in the casing and eliminate any excess room that would allow it to twist around inside the casing.

Not loving this view!
Here is the finished muslin from the side. Note the protruding abdomen, (and then feel free to forever abolish the image from your brain!) the tautness of the fabric below it, and that crooked side seam. This muslin is too small. All of these pictures were taken months after the pants were first completed. At that point, they were really too small. I have since lost some weight and dietary changes have somewhat adjusted my abdominal bloat, so there has been a great improvement to that original fit. Unfortunately, the picture is so washed out but you may be able to see where the side seam indicates where more width in the pattern is needed. Try hard you can also see the beginnings of those diagonal wrinkles towards the back indicating the need for the full thigh adjustment.


The view from the front is where you can see the high waist and how they fit at the front thigh with a few radiating markers of fitting issues. Also note that once on, despite the 10" difference between my hips and waist, the amount of visible gathers from the waistband are minimal and don't add too much bulk. So the waistband works, but the rest of the pants do not.


Last little note, since these were never meant to be finished, I cut almost 4 inches from the length in order to try them on. I am 5' 4" inches tall, so definitely compare your desired pant length against the pattern pieces before laying and cutting out your fabric. I would hate for you to lose that much fabric needlessly.

Would you sew it again? Would you recommend it to others? Since this is a muslin, the real question is will this pattern work well enough for a final version? I believe so, with a minimum of changes. The waistband is a keeper and the use of 2" elastic creates a comforting and supportive waistband; especially if you have some girth you wish to control in that area.

Unfortunately, my muslin did not fit, but then that's the purpose of a muslin. I don't know how much can be blamed on the fabric choice since the Lycra content of this particular fabric was a mystery and I did not know exactly how much* stretch the pattern required. According to the company's posted measurements (waist: 33.5, hip: 42.5) I did choose the right size and in fact, those numbers are 1" larger in the waist and .5" in the hip. However, my full abdomen and inner thighs may have affected the ease distribution.

Conclusion: I will make these pants again and not only to adjust and correct the pattern before attempting the other two Style Arc pants patterns I own. This was a more than decent muslin compared to other pants patterns I have tried. If I hadn't made them out of a see-through white fabric I could even see finishing them off and wearing them out on my "no bread and dairy" days.

*Instead of suggesting a Lycra/spandex content percentage, Style Arc instead directs you to purchase their own stretch gabardine that possesses a 30% vertical stretch (?).

Wednesday, June 11, 2014

Quick Grainline Moss Update - Part 3.5

I finished the waistband and took some more pictures for reference. I think I'm ready to cut out the fashion fabric. What do you think?
 

Note: worn with my newest Grainline Scout tee!


There is that small hiccup in the back yoke but I think it will be fine in the denim, I had problems with this cotton stretching a bit when I was sewing it and that might be the result.

Messing With My Moss Muslin Part 1
More On My Moss Muslin, Part 2
Making New Muslin For My Moss, Part 3

Sunday, March 30, 2014

Please Help Me With New Look 6145

I am loving the fit of the muslin* in these two pics, the neckline is flattering and not too wide. The shoulder looks good with just enough ease.


As you can see below, the back seam of the top is completely sewn up, however, when I raise my arms suddenly all this fabric appears. I know this is probably an armscye issue but which one and how to fix it?  Looking through all  twenty of my sewing books, none mentioned this issue specifically.
  

So, is this normal, is this ok? It has been a while since I made a straight non-gathered bodice in a woven fabric so I'm not sure. I can add some shoulder darts but is there more that I should do?


I think the armscye is too tight and needs to be lowered, what do you think? 
 
Please help me, I really want to move on to the dress. Any ideas?


*By the way, while I like this fit, in order for this top to become my inspiration shift dress I will need it to fit looser anyway.

Monday, February 18, 2013

More On My Moss Muslin - Part 2

Yup, my Grainline Moss is still not done.

The Before

Above is what I started with, so my first step was to add some darts to the back for shaping. My first darts were only in the yoke and waistband as a test.


Notice the extreme bump-out out at the skirt portion. It was because I didn't extend the dart into the skirt portion. However, it did show that my thinking was going in the right direction. Seeking help, I emailed the designer Jen Beeman and according to her I had two choices: 1) alter the waist/yoke only and make a visible dart in the skirt or 2) alter the yoke pattern and adjust the skirt pieces by removing half the intended dart's width from each side in order to eliminate the need for a dart. I chose 2 for a dart-free skirt.


Jen Beeman's hand drawn instructions
I extended the dart about an inch or less down into the skirt. If the end point is perfectly placed it works. I outlined the dart with colored pencil while it was still sewn together, unpicked the entire back portion separating the three elements, and then traced the dart lines on each piece. I also traced these dart markings onto the pattern pieces, cut them along the dart legs and taped them back together. Using a piece of tracing/artist paper along with my design ruler I softened the angles. I will make another muslin (just to be sure) instead of cutting into my fashion fabric.

New patten pieces. Quite a metamorphosis, right? From practically straight across to extremely curved.
In addition, to the dart changes above I added a little more curve to the vertical back seam and added some width to the hip area at my widest point to address the "protruding thigh" issue. These changes seemed to have worked until I returned after the holidays and found the skirt was a bit too big now. (Yes, it could only happen to me!) I also believe the angles on my new pattern pieces were too sharp. So, I refined the yoke pattern piece and tried again. However, as the second photo below shows there is still a little puffiness where the yoke meets the waistband, so I think the waistband curve may be too extreme. So I will try again with even more refined pattern pieces.


New pattern piece for the yoke incorporating the darts.
  
New side view with a bit more pattern alteration to do.
Note: I may have seen a solution to my waistband problem, or at least half of it. Adrienne of Stitching on the Edge chose to fully construct her front and back skirts separately, including the waistband. This means that I only have to perfect the curve on that one section that needs to curve and not the front waistband section.

Now the front is a bit loose in the center? Why?!

Messing With My Moss Muslin Part 1

Tuesday, November 27, 2012

Messing With My Moss Muslin - Part 1

Well, I have made it to the tenth project on my official list. Two weekends ago, I constructed a muslin for the Grainline Moss Miniskirt.


I am so glad that I sewed up a muslin for this skirt. It looked good and fit on the front side. Though I used the correct size for my measurements, the distribution of my "stuff" requires a little more width at my hip and perhaps a little bit more length center front for a protruding abdomen. My copies of Sewing Pants That Fit and A Perfect Fit informed me that I also needed an alteration for protruding front thighs.
See the indentation under the stomach and the horizontal stretch below that at upper thigh level.

However, the back was a fitting mess. It seems my "badonkadonk" is just too "bootylicious" for this skirt! The shaping that was designed for the back skirt pieces was not enough for me.


There is a 10" difference between my hip and waist measurements and a lot of gaping above my most protruding part. The problem must be the way my "stuff" is distributed back there. The center back waist-to-hip area needed to come in a lot. I placed two 1" wide darts in the yoke and waistband part only. This seemed to work but I still needed to know how to alter the actual pattern pieces in order to cut my fashion fabric.

At first, I thought of opening up this post to reader ideas when I realized I could do one better. I emailed Jen Beeman of Grainline Studio, the designer of the pattern, and she supplied the details on how to complete the skirt. She even hand drew me helpful illustrations and actually did all that over the Thanksgiving holiday! Way to go, Jen, thanks!

Next time I post, hopefully it will be to show you the corrected muslin and altered pattern pieces or the final garment. However, I know it won't be this weekend as I will be attending the MD/DC/VA sewing blogger meetup on Saturday!!!!!